Field
Template allows us to classify data according to different industries. But in each template, we need to define the Name, SKU, UPC, Quantity, etc., which we call Field.
INFO
If this is your first time knowing DatamineHub, you may wonder what DatamineHub does and whether it can meet your needs. You can quickly browse our brief introduction and main concepts
INFO
If you don’t have an account yet, you can give it a try. DatamineHub offers a permanent free tier, and no credit card is required for registration.
You can also start with mobile app and scan your barcode with mobile app for free, even try it without signup.
TIP
Field feature is available on both DatamineHub Mobile App and Web App. You can choose which platform you would like to check which decides the screenshots in this page.
INFO
You can also watch the corresponding video (double click to full screen)
What's a Field?
Fields are data types related to your business, such as inventory data. You may need to record SKU, Quantity, Price, Supplier, etc. These are fields.
How to add fields?
Since there are two ways to create sheet, Template Based and Non Template Based, to learn more about sheet, check sheet doc.
So there are also two ways to manage the fields:
Fields in Template
Let's say you just created a new template called 'Inventory track'. But so far, this is just an empty template, we need to define the fields for this template.
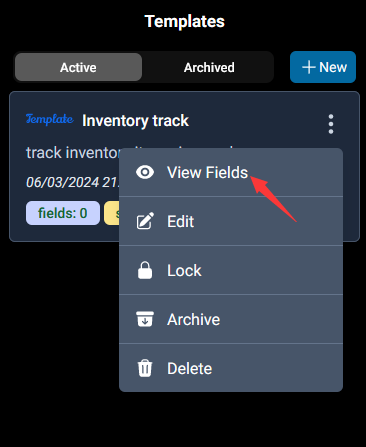
To do so, let's simply tap the vertical ellipsis icon on template 'Inventory track', and choose the first menu option, it will pop up the Add Field modal. To learn how to create template, check the template doc.
Initially, there is no fields (or some fields from the clone template):
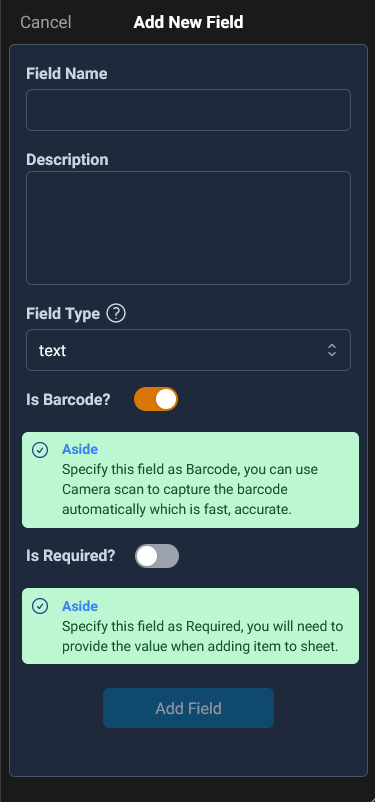
Click the '+ New Field' button, the Add New Field modal pops up:
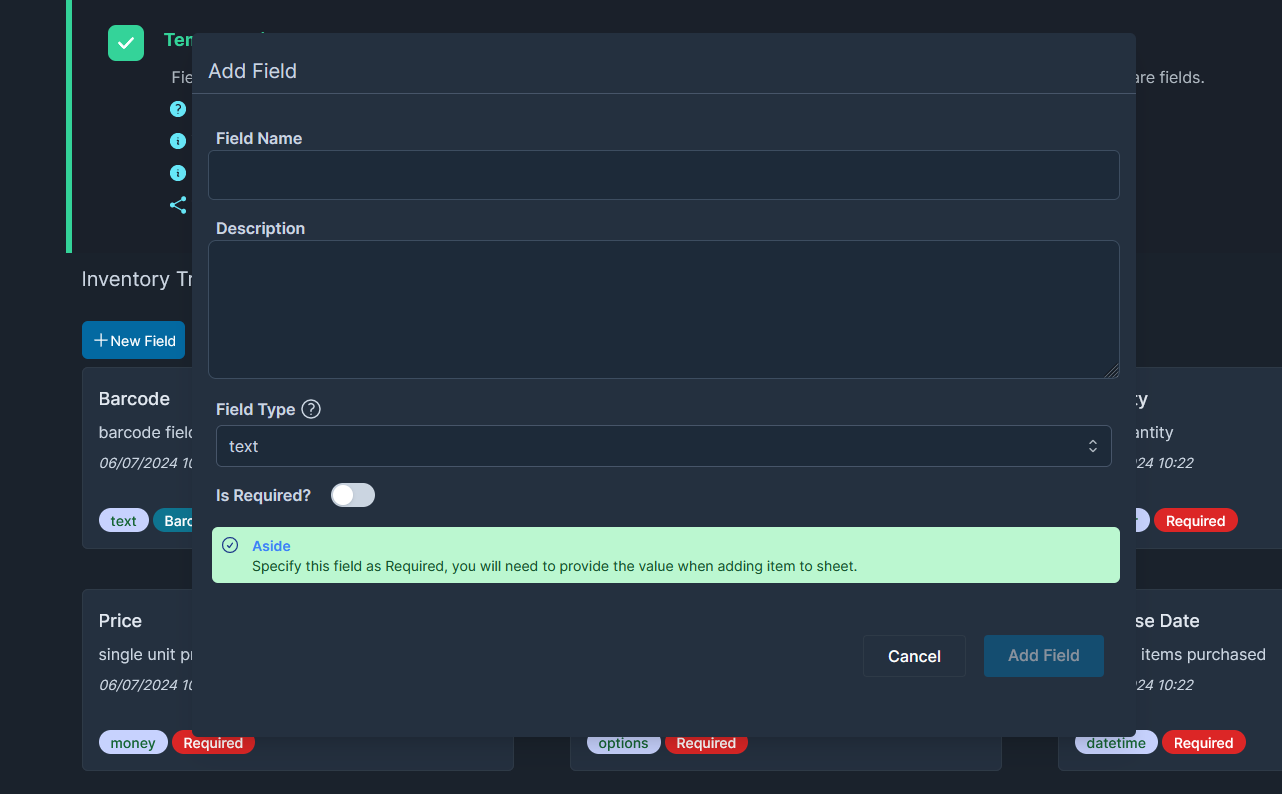
- Field Name: set a name to the field, such as SKU, Quantity, etc. It's mandatory.
- Description: set a meaningful description about the purpose of this field. Although it's not mandatory, better to do.
- Field Type: we support 8 different types. Check the Field Types section below to know the details on each type and how to use them.
- Is Required?: if set this field as required, then you will need to provide a value in the sheet that based on this template. Otherwise, the value can be skipped.
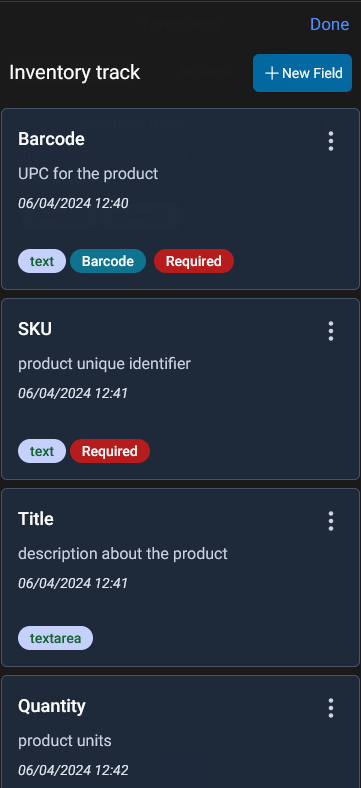
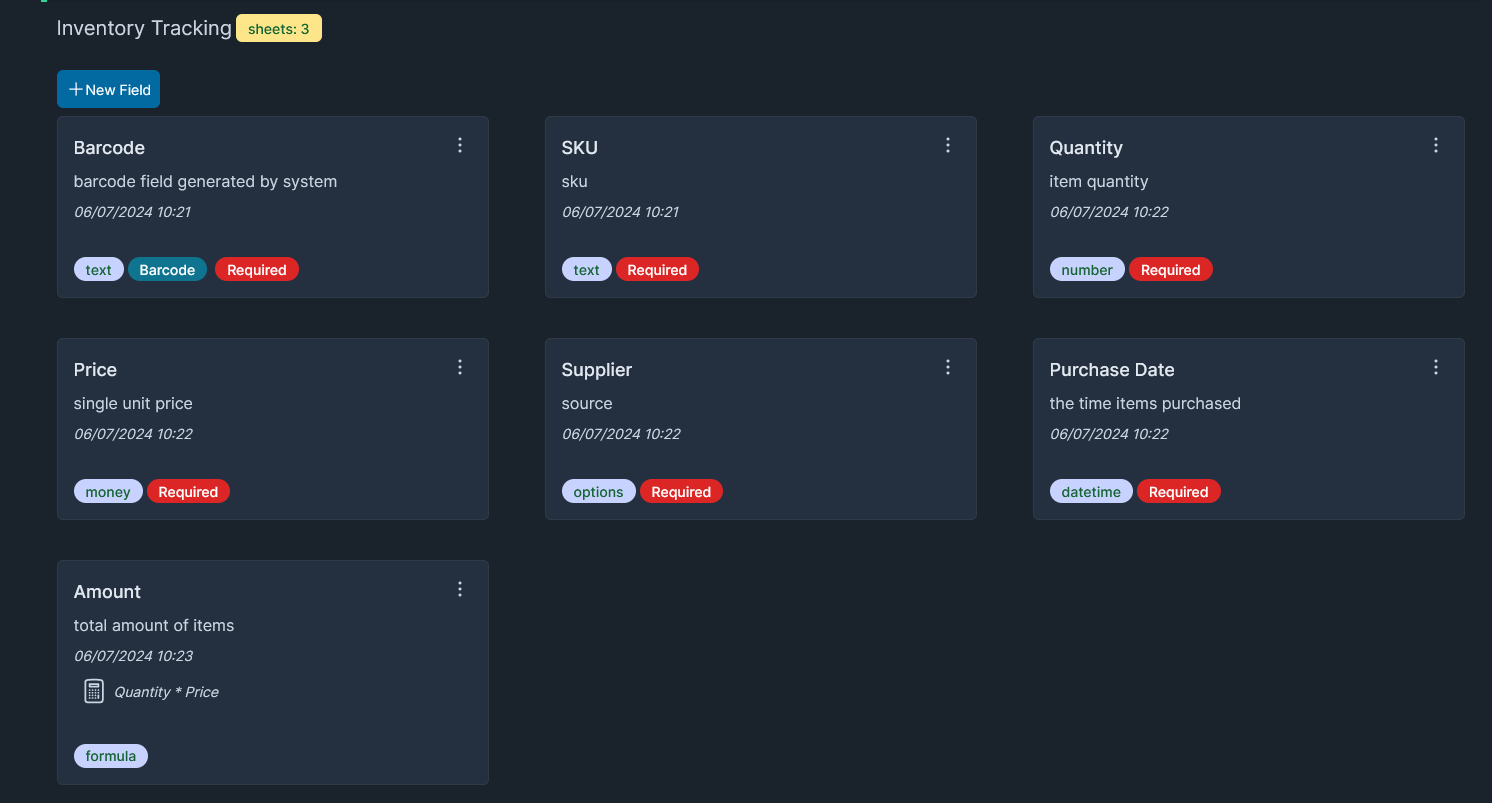
Repeat the process for each field you need. Let's say you created fields: Barcode, SKU, Title, Quantity, Price, Purchased Date, Supplier, Amount. Finally, the fields list would looks like:
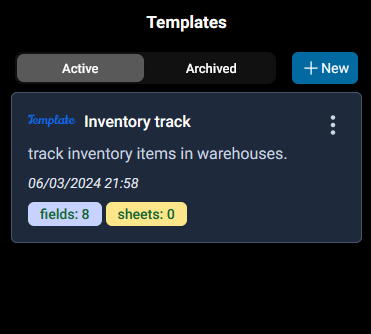
Back to Templates page, you would see your template with the fields count:
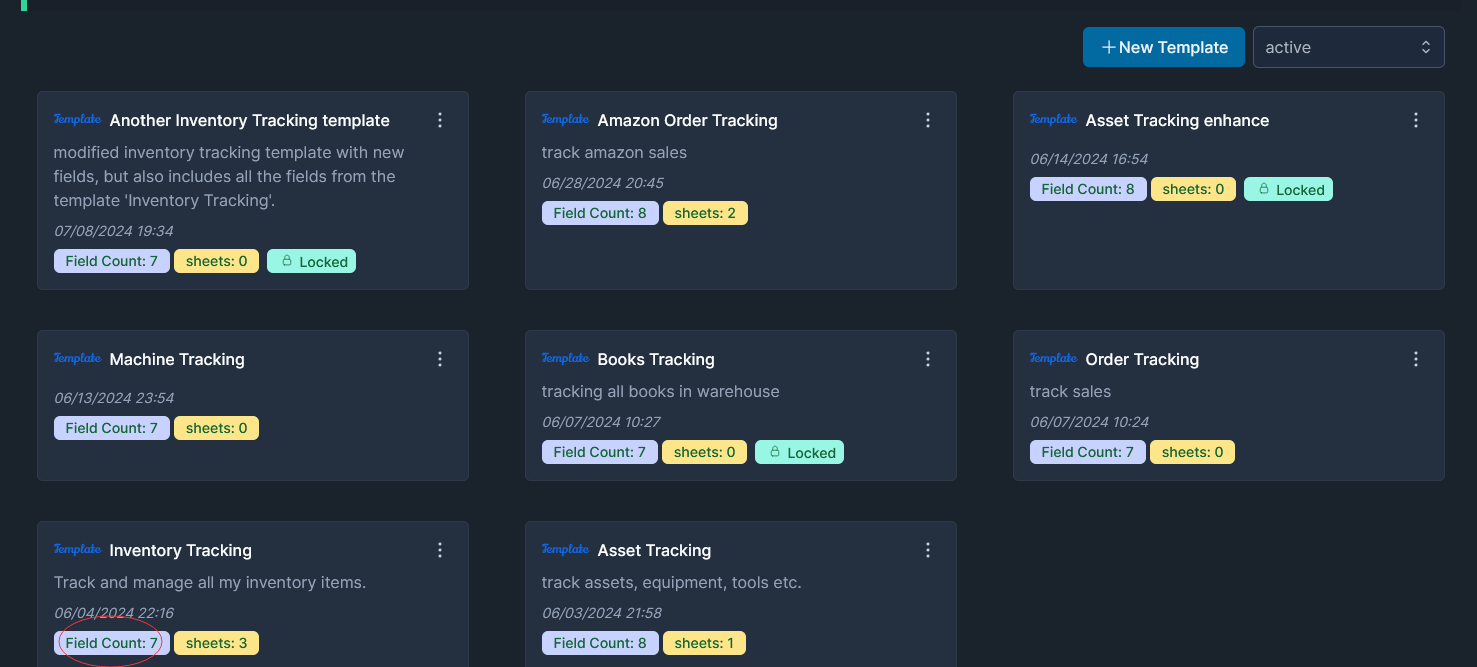
The fields badge tells how many fields in this template. While you see the sheets badge is 0, because we haven't created sheets based on this template.
Manage Fields
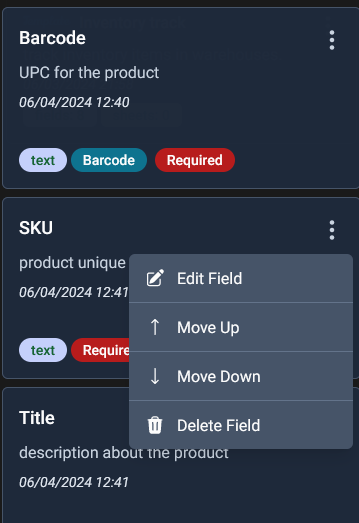
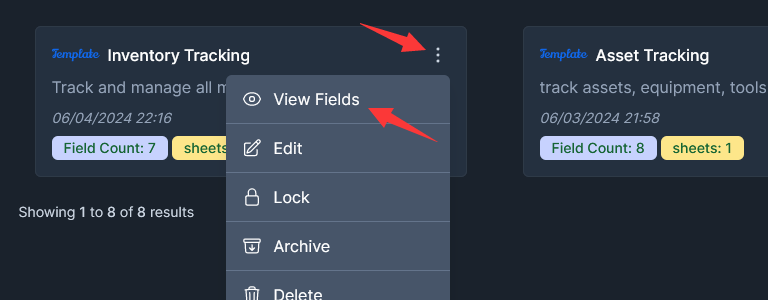
You can manage the fields of given template by tapping the vertical ellipsis menu and select View Fields, then in the fields list, tap the vertical ellipsis menu:
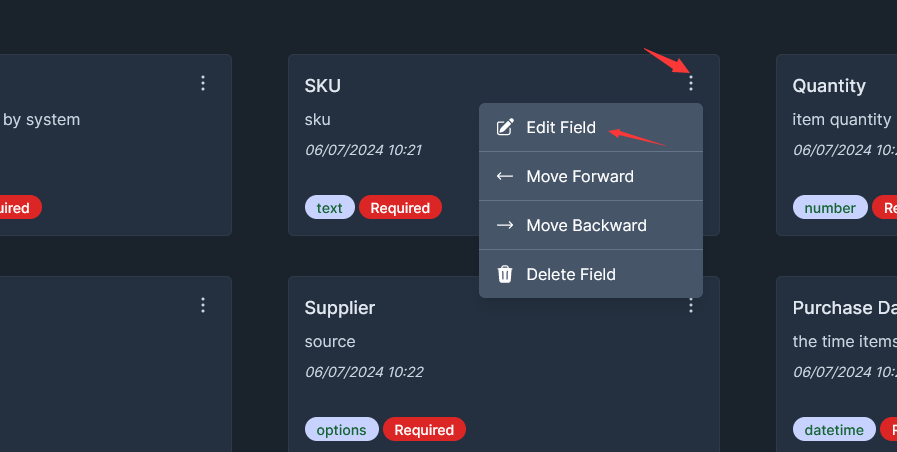
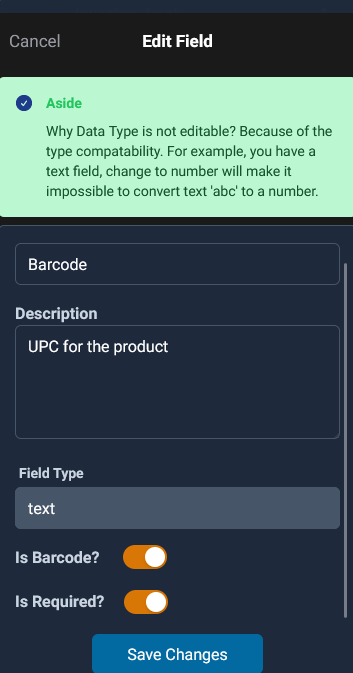
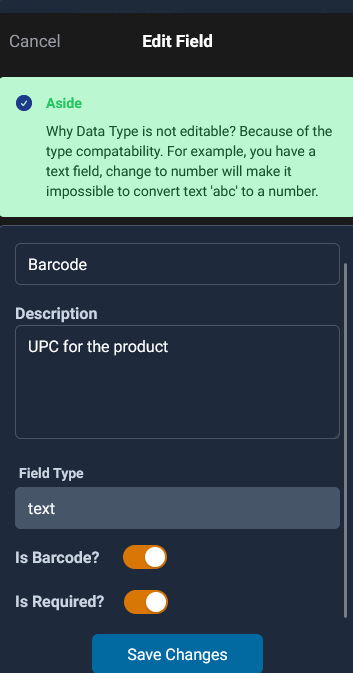
- Edit Field: You can change the Name, Description, Is Barcode and Is Required toggles. But you cannot change the data type because of the data compatibility. Let's say you have a Quantity field and you already have items added. Now, change the Quantity field from number to text will cause incompatible issue, there is no way to convert a number 2 to a text.
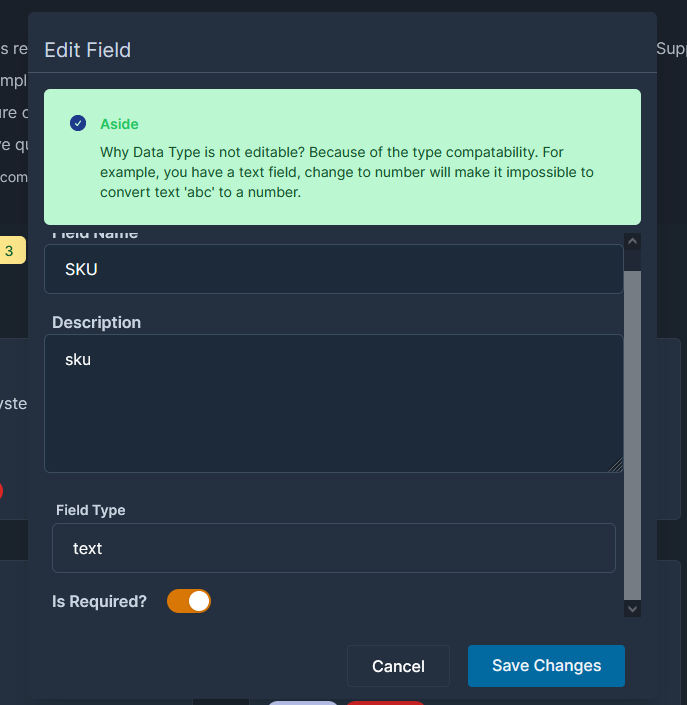
Move Up/Down: it will move the given field to show up/down in the field list.
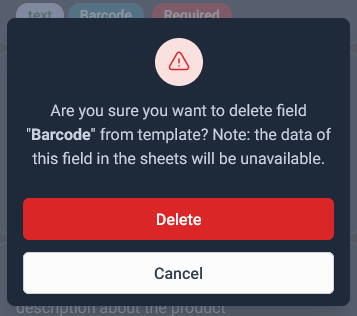
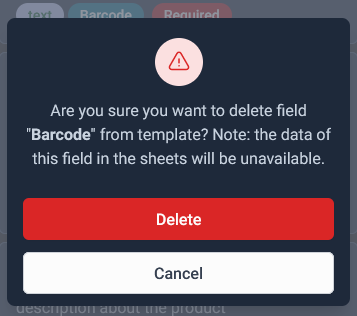
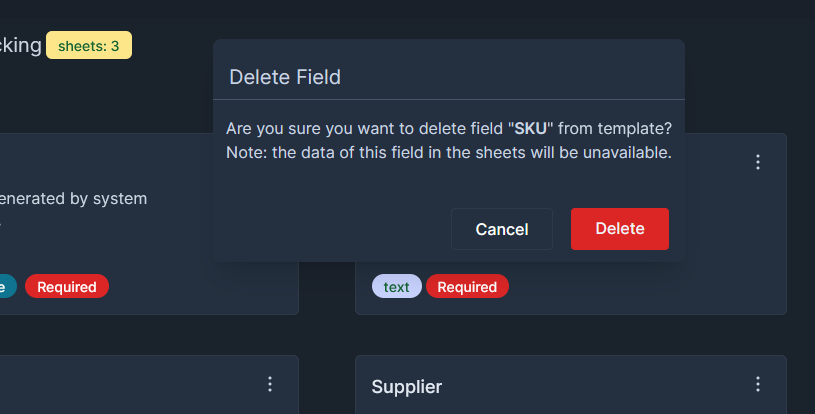
Delete Field: with the confirmation, you can delete fields from the template. Note: the data of this field in the sheets will be unavailable.
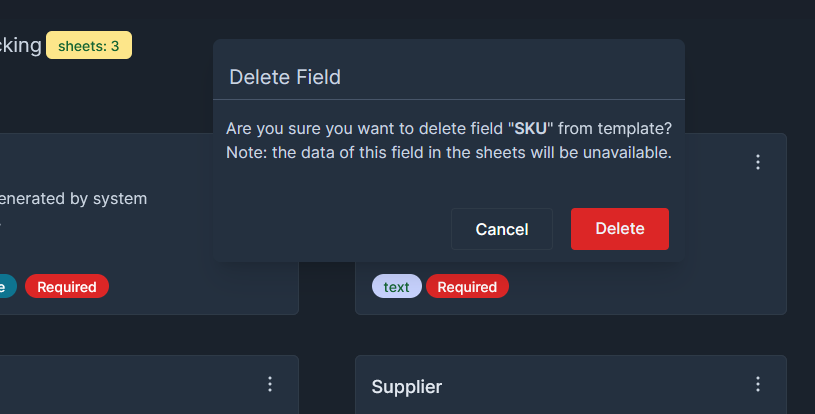
Fields in Sheet
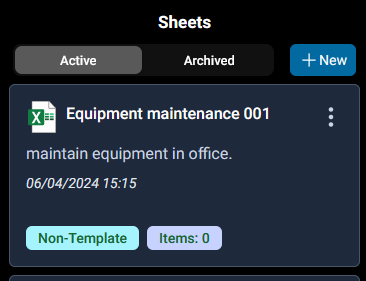
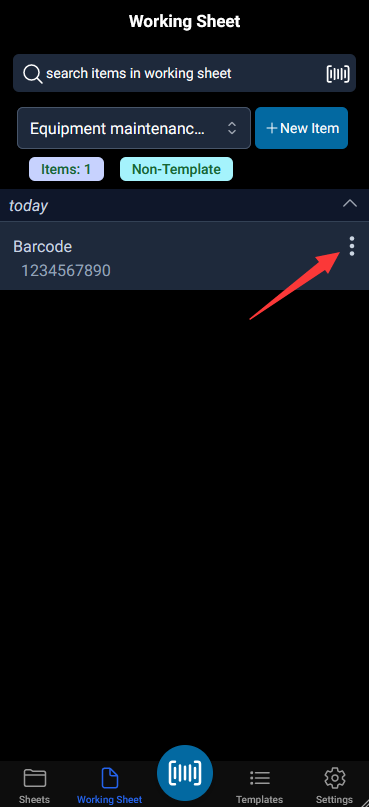
If you created a Non Template Based sheet, you will need to manage the fields within the sheet. Let's say you just created a new Non Template Based sheet named 'Equipment maintenance 001', to learn how to create a sheet, check the sheet doc.
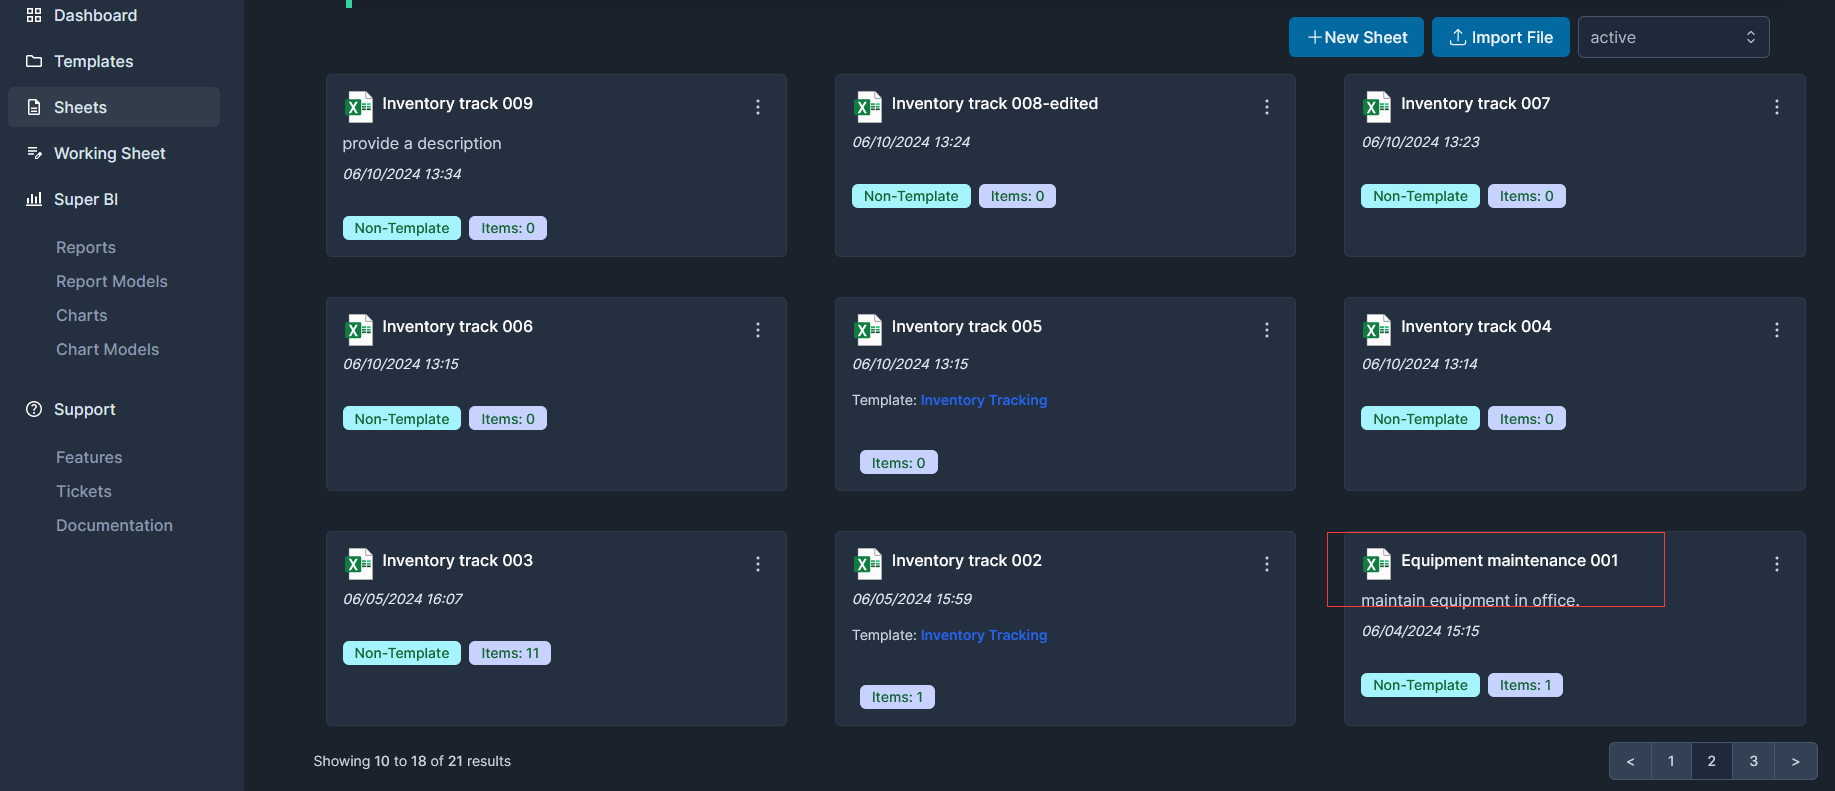
Conceptually, the fields of a sheet belongs to that given sheet only, different from the template fields, there is no dedicated place to manage the sheet fields. You only can do that when adding/editing the items in the sheet.
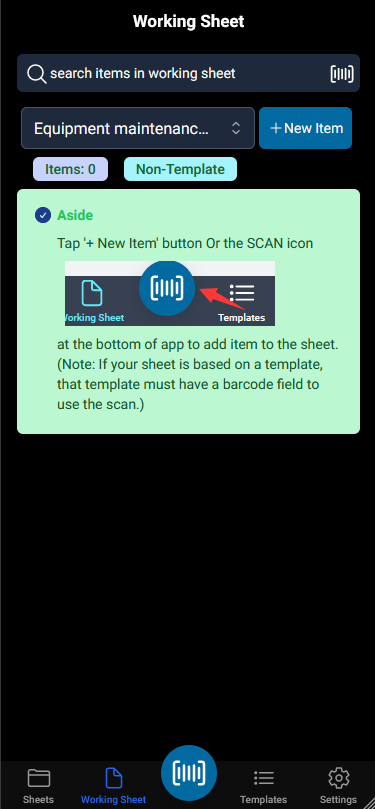
To Add items to a sheet, choose it as Working Sheet. To learn more about Working Sheet, check the Working Sheet doc.
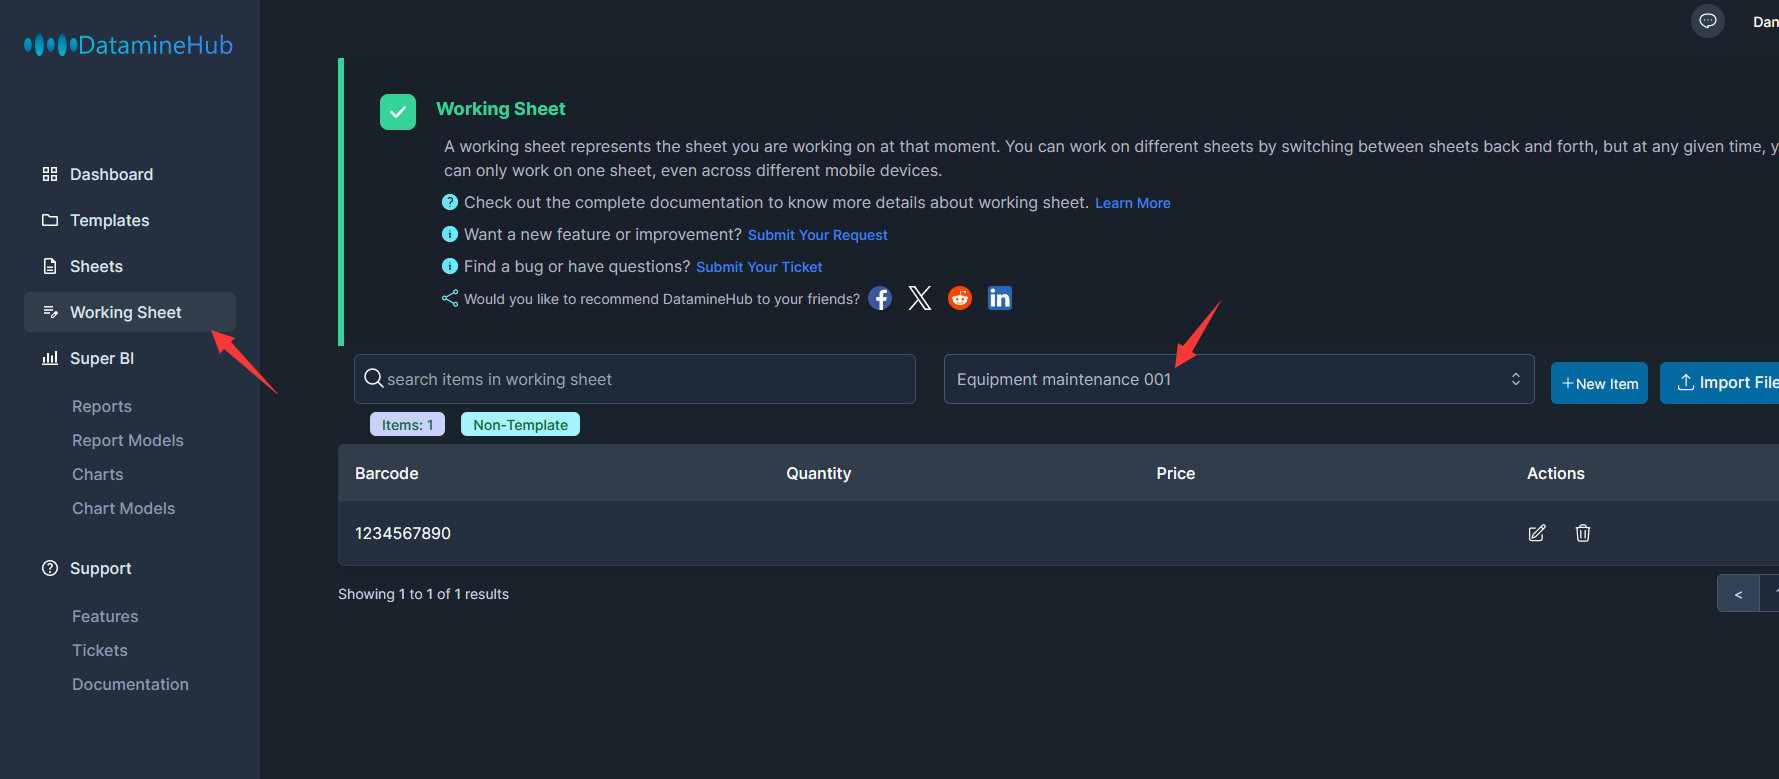
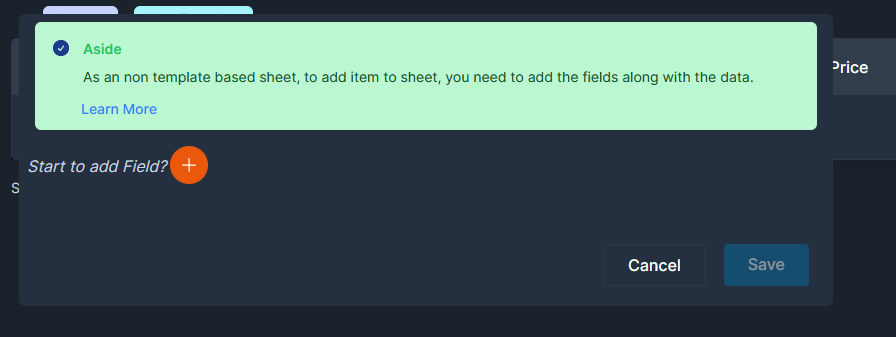
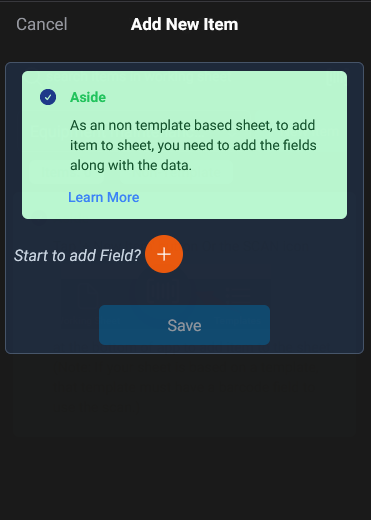
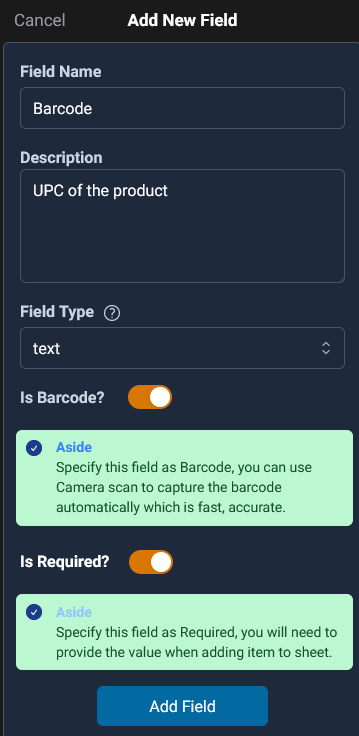
Initially, there is no field in this sheet, so we can create one, tap the orange + icon to create a new field, let's say a text field for Barcode data:
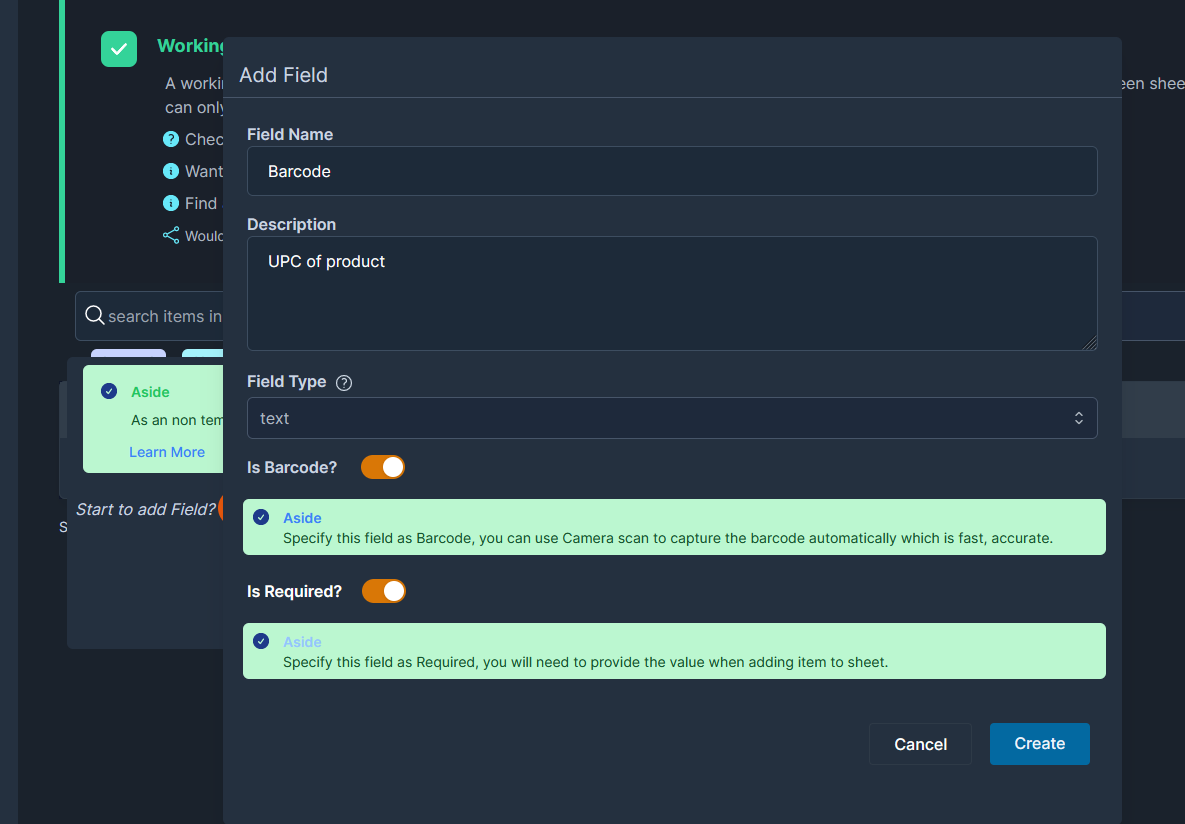
Here, we toggled the Is Barcode? ON and Is Required? ON. Set the field name 'Barcode', a simple meaningful description, field type as text.
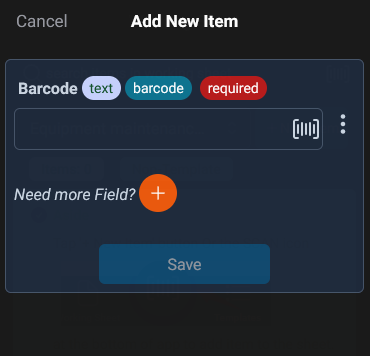
Tap the Add Field button, back to the Add New Item page. Now, we see the just created Barcode field:
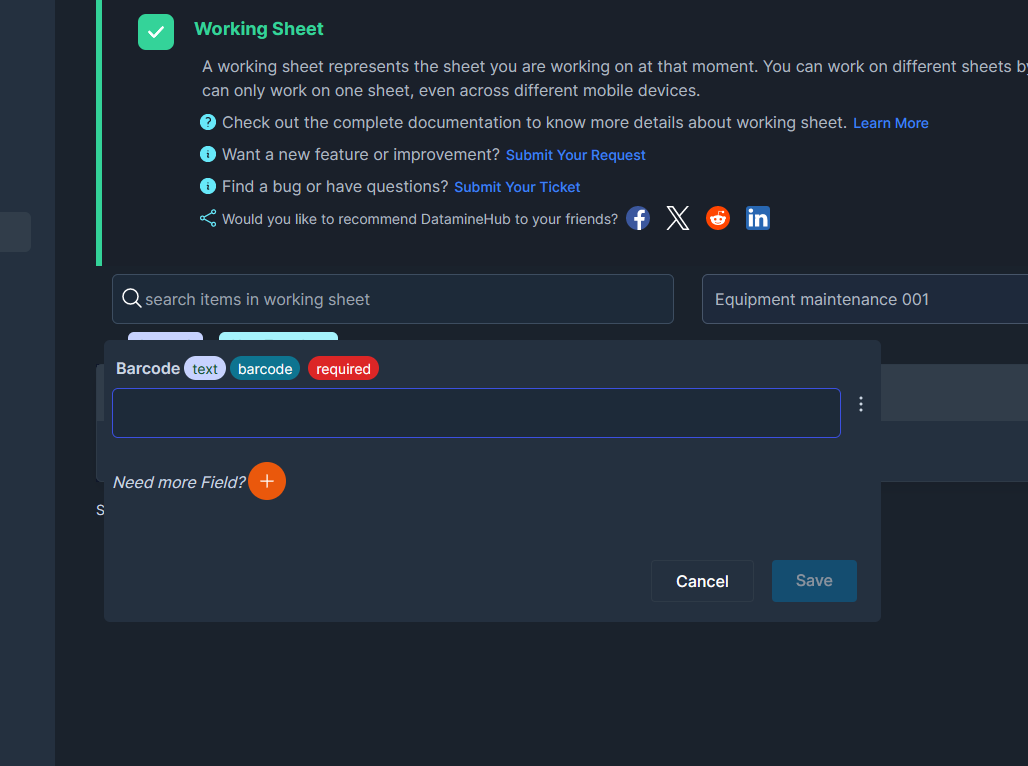
Since it's the web app, if your computer has an external barcode scanner plugged in, you can get the barcode from it. Otherwise, you have to enter the barcode mannually. If your business requires barcode heavily, we recommend to use the mobile app where you can use the built-in barcode scanner to capture the barcodes.
Follow the above process, you can add more fields to the sheet. You might noticed already, you only need to define these fields for your first item in the sheet. Once you have all fields ready, the next item you will add to the sheet doesn't require you to define the fields again.
Manage Fields
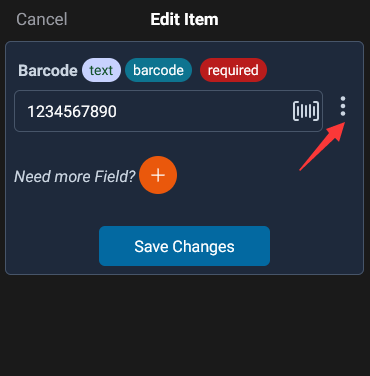
You can manage the fields of given sheet during adding item or edit item in the sheet. In the previous section, we just created a Barcode field and added that item to the sheet.
Either tap the '+ New Item' button or the vertical ellipsis menu to Edit the item:
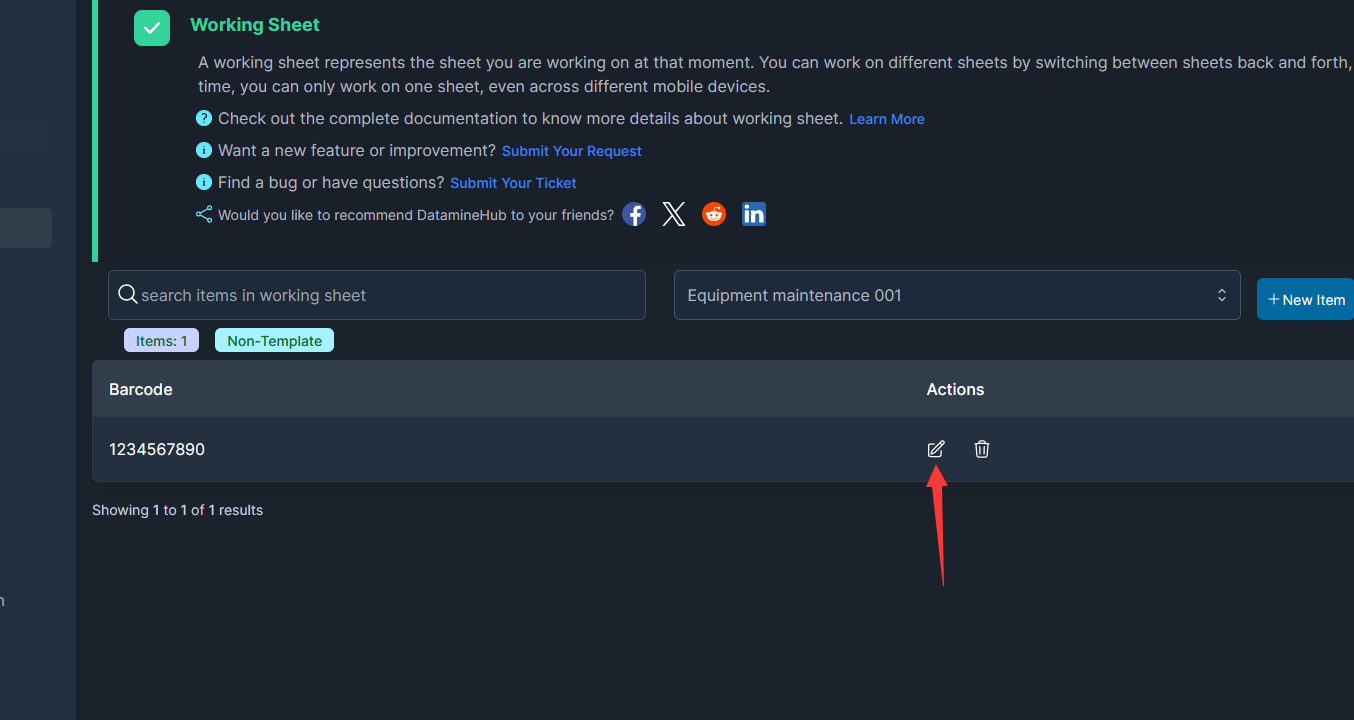
Now, in the item edit modal:
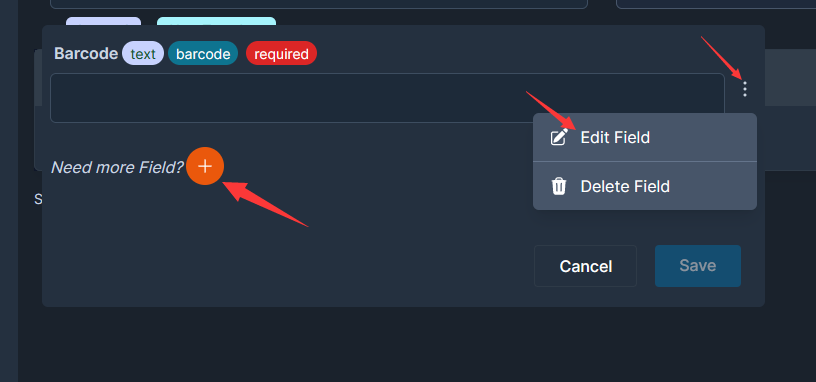
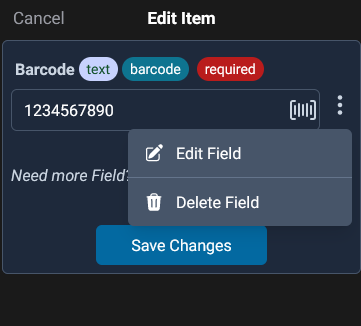
You can continue to add more fields by tapping the + icon or the vertical ellipsis menu to Edit/Delete the field.
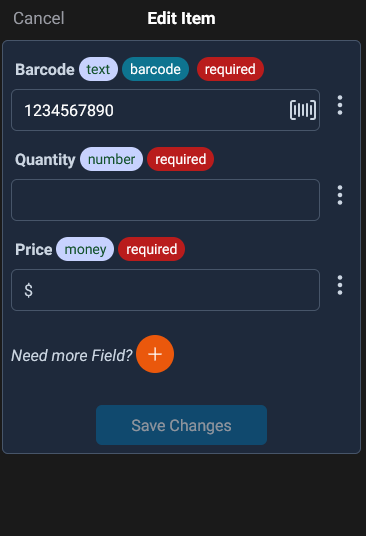
Let's add two more fields: Quantity and Price:
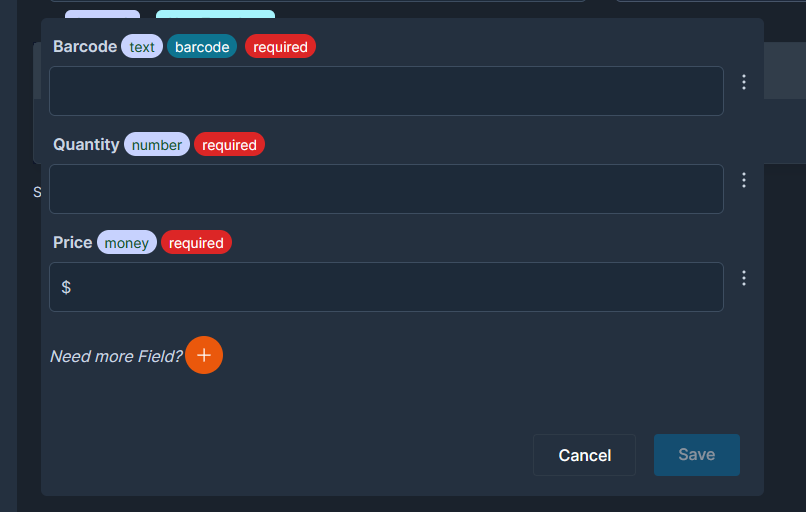
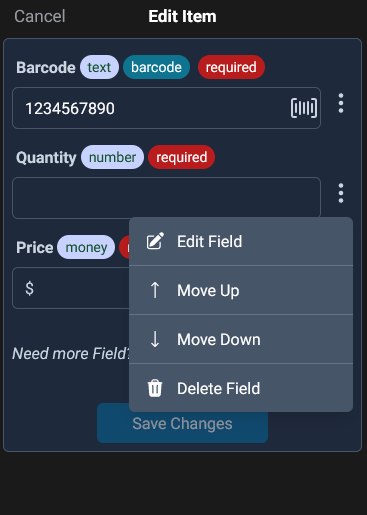
Now, tap the vertical ellipsis, you would see:
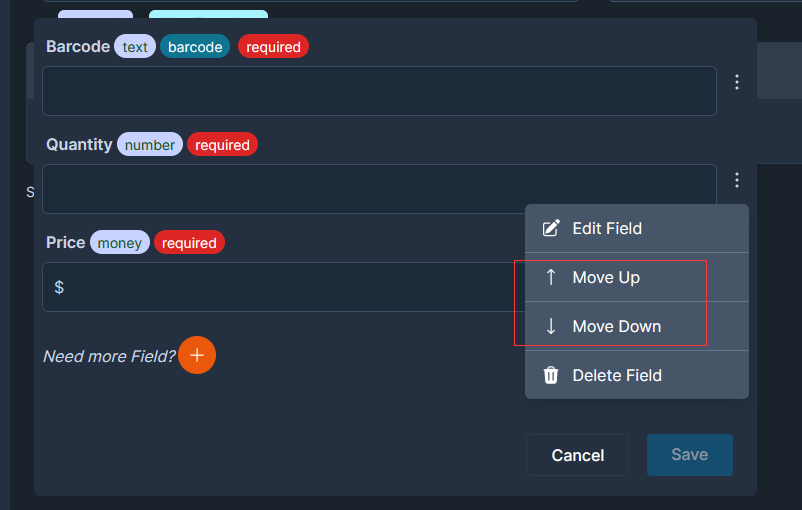
There are two extra options: Move Up, Move Down. these allow you to adjust the sequence of the field position in the sheet.
- Edit Field: You can change the Name, Description, Is Barcode and Is Required toggles. But you cannot change the data type because of the data compatibility. Let's say you have a Quantity field and you already have items added. Now, change the Quantity field from number to text will cause incompatible issue, there is no way to convert a number 2 to a text.
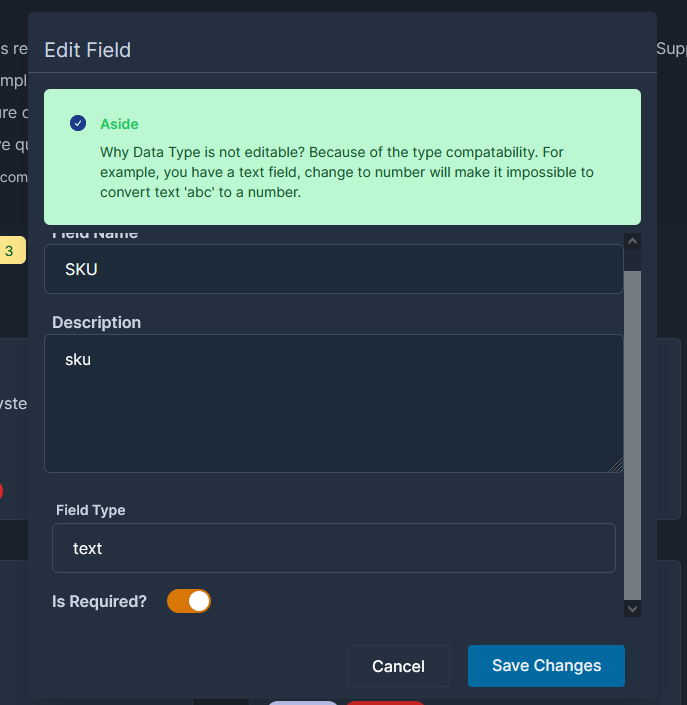
Move Up/Down: it will move the given field to show up/down in the field list.
Delete Field: with the confirmation, you can delete fields from the sheet. Note: the data of this field in the sheet will be unavailable.
Field Types
| Field Type | Use Case |
|---|---|
| text | Anything that can be described in words can be used in the text field, such as name, title, description, notes, barcode. |
| number | Non negative number, such as Quantity, age. |
| decimal | like 0.5, 3.87 those floating point value, typically used for Price, Weight etc. |
| money | Money is also a decimal, the difference is money includes currency, so you can specifiy the currency to the decimal, such as USD, EURO, etc. this is helpful to represent price, amount etc. |
| datetime | date with time. |
| textarea | textarea is also a text, but with this type, you can input more characters. |
| options | It's a list, you define the options and then choose one in your sheet. For example, Supplier. You probably can define all your suppliers, such as Walmart, Target etc, and then just pick one when adding items. You can also set one as default, so you don't have to choose one every time. |
| formula | This is a very powerful feature, no matter how complex the formula is, as long as it's valid. It's typically used for field associate with other fields. Let's say you have a Quantity field for the item quantities, a Price field for single item price, you probabaly want to have an Amount field that represents the total price. so you don't need to calculate the Amount manually everytime, just set the Amount field as formula, and formula expression as Price * Quantity, then the app will do the calculation automatically. |
TIP
Below screenshots for each field type is based on DatamineHub mobile app, the web app follows the same rule.
text
To add a text field, such as title, name, SKU, barcode, notes.
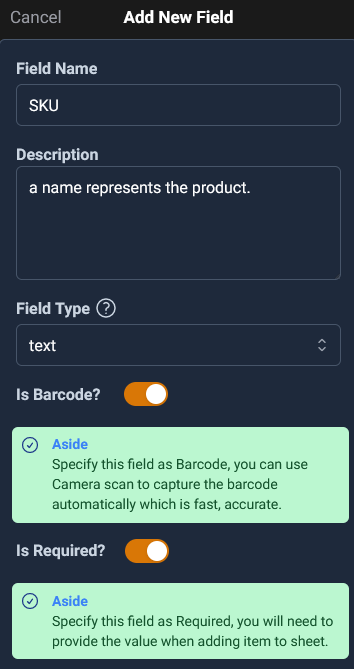
If it's barcode field and you can toggle the 'Is Barcode?' on. In this way, you will be able to use the barcode scanning function which is awesome.
And if it's a required field, just toggle the 'Is Required?' on.
number
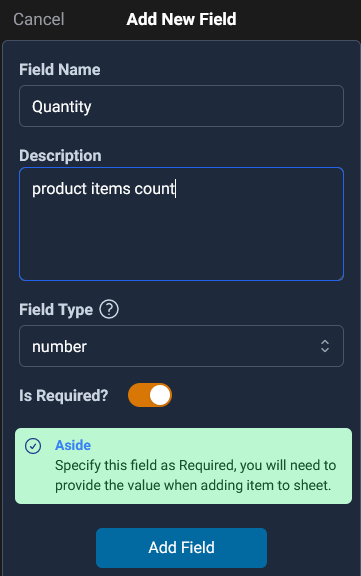
For any non-negative number based thing, like Age, Quantity, choose this type.
And if it's a required field, just toggle the 'Is Required?' on.
decimal
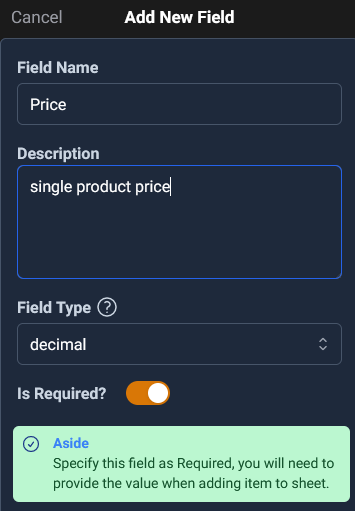
For any floating point value, like Price. Choose this type.
And if it's a required field, just toggle the 'Is Required?' on.
money
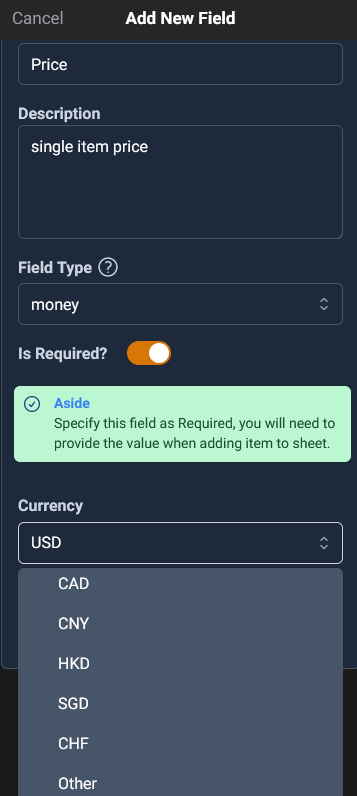
money field is also decimal, you can use decimal to represent the price, but if you need to have the currency, then the money field is the right choice, once you chose the money field, you can select a currency, we have the most common currencies for your selection, but If the currency you need is not listed here, you can select other and enter the currency you actually use. Like below:
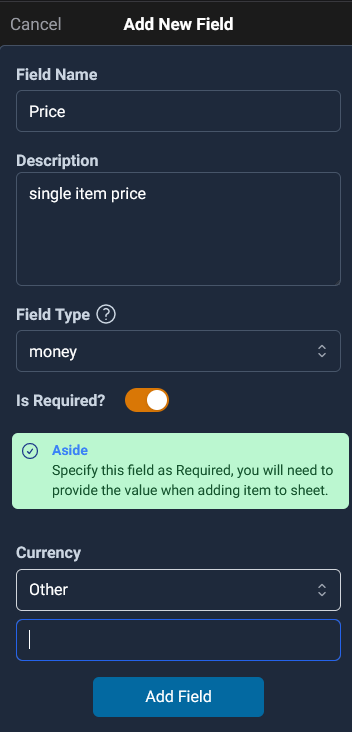
And if it's a required field, just toggle the 'Is Required?' on.
datetime
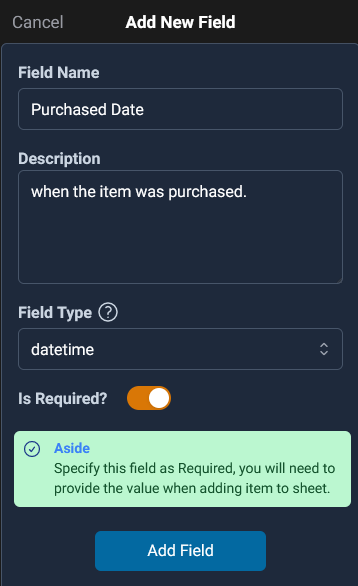
For any date time value, like Purchased Date. Choose this type.
And if it's a required field, just toggle the 'Is Required?' on.
textarea
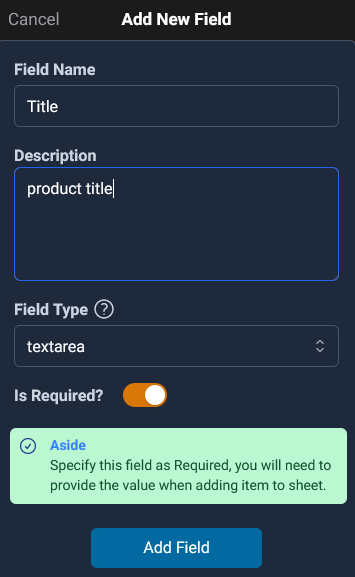
textarea is also a text, but more useful if you need a long string, such as title, description, notes etc.
And if it's a required field, just toggle the 'Is Required?' on.
options
It's a list, you define the options and then choose one in your sheet. For example, Supplier. You probably can define all your suppliers, such as Walmart, Target etc, and then just pick one when adding items. You can also set one as default, so you don't have to choose one every time.
To add an option, set the value and tap '+' icon to add it.
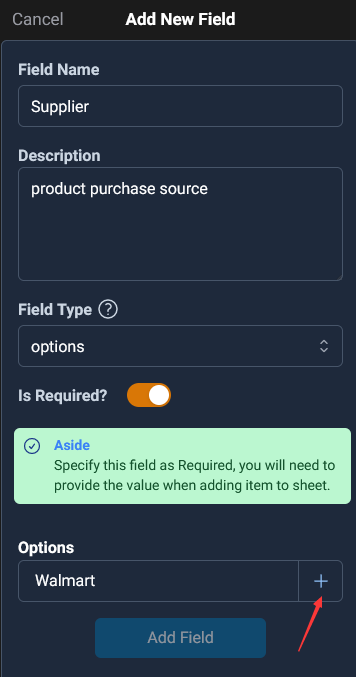
You can add all options. Note: by default, the first added option is the default, that means, when you adding item to sheet, you don't need to select one, the default will be chosen automatically. Of course, you can change the default.
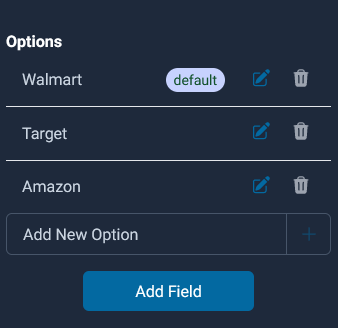
Delete option: tap the delete icon to delete that option.
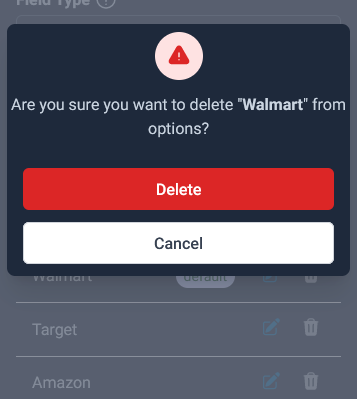
The popup makes sure you know the delete.
Edit option: tap the edit icon to edit that option.
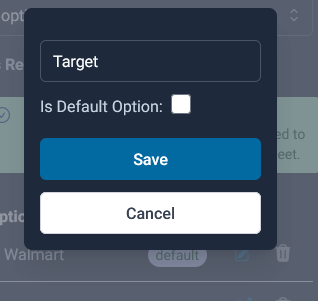
You can change the option, and also mark it as a Default option.
formula
INFO
Because of the complexity of formula, there is a video to explain the workflow (double click to full screen)
To construct a formula, choose the formula type. You would see like this:
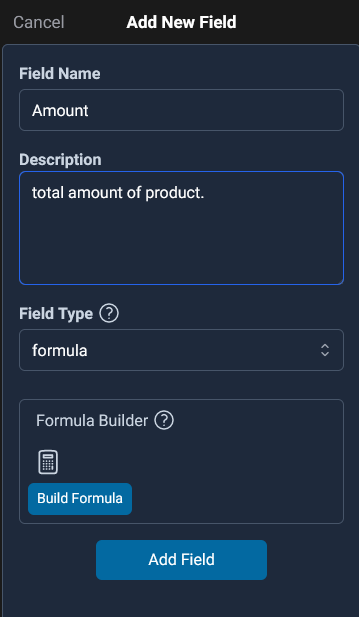
Tap the Build Formula button, let's get started:
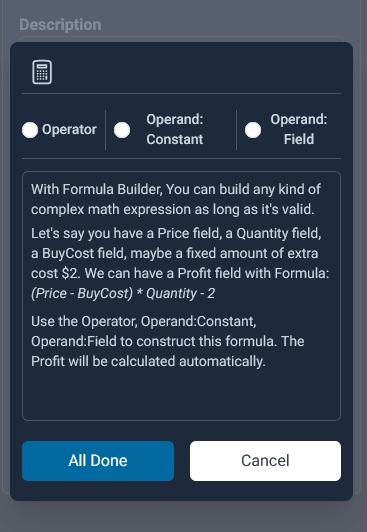
A formula is usually an expression consisting of operators and operands. In its simplest form, it can be just a constant, such as 2 or 56.98. It can also be a complex expression, such as (3.4+91.03)*5.8-22, where 3.4, 91.03, 5.8, 22 are operands, and +, *, -, and parenthesis are operators. Then we can construct such an expression in the formula builder as long as it is valid.
- Operator:
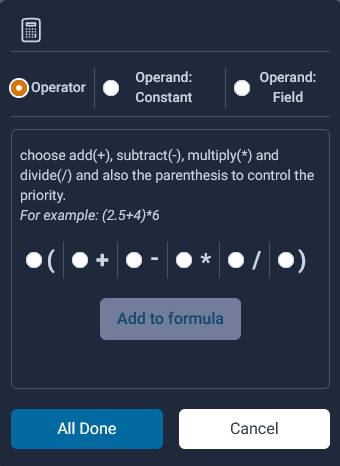
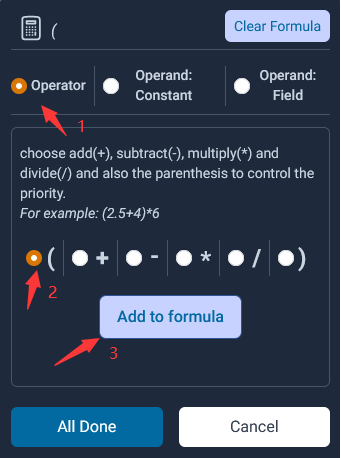
we support add(+), subtract(-), multiply(*), divide(/), and parenthesis to control the priority. Choose one and tap the 'Add to formula' button.
- Operand Constant:
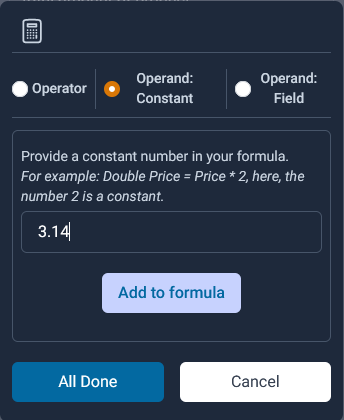
In some cases, you may only need simple constants, then you can set the required constants directly here, such as 3.14 in the example.
- Operand Field:
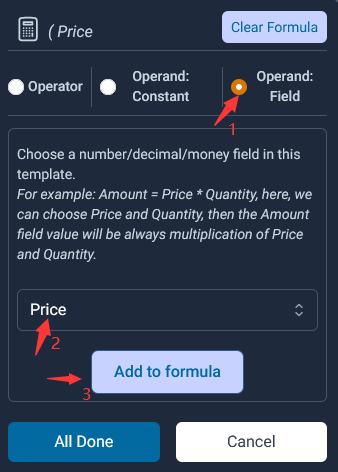
Different than the constants, this is the dynamic fields we can set. For example, Amount = Quantity * Price. Assume we already have the Quantity and Price fields added, so we can set the Amount as formula and build it.
If you haven't had any number/decimal/money fields added in the template, and you would see a warning like this:
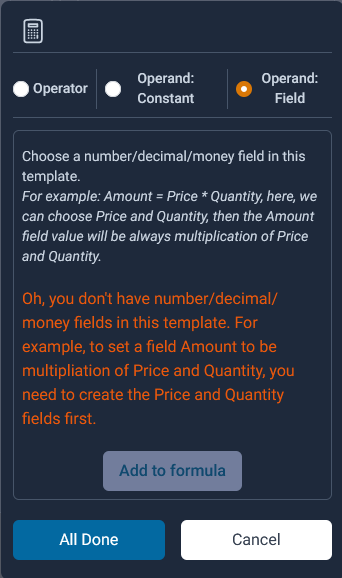
It's fine if your formula doesn't need dynamic fields, just constants, you can ignore this warning. Otherwise, you should add the other associated fields first. such as Quantity and Price.
After added the assosiated fields, you would see them in the select options:
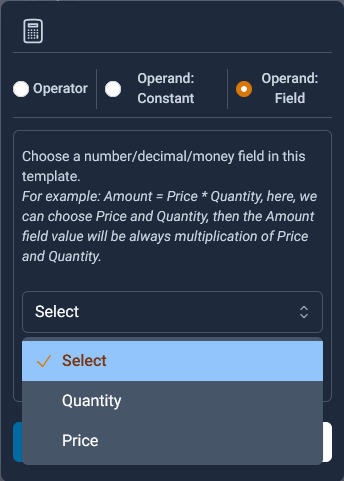
So let's build the Amount as formula: (Price + 0.1) * Quantity. Follow the formula sequence, we build in below steps:
- Choose 'Operator'-> start parenthesis, tap 'Add to formula'.
- Choose 'Operand: Field'-> select Price, tap 'Add to formula'.
- Choose 'Operator' -> select +, tap 'Add to formula'.
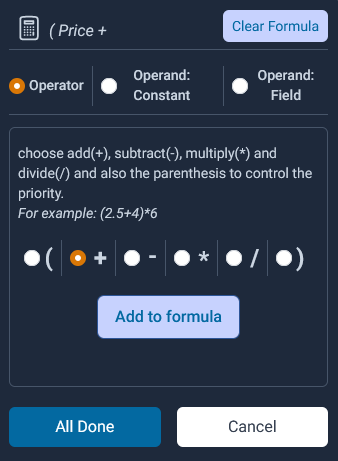
- Choose 'Operand: Constant' -> input 0.1, tap 'Add to formula'.
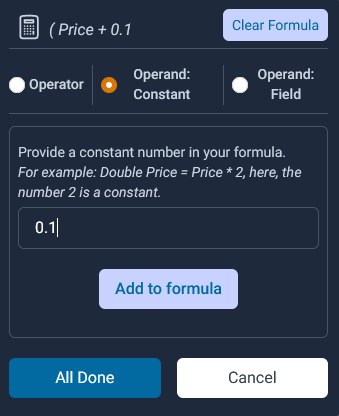
- Choose 'Operator' -> close parenthesis, tap 'Add to formula'.
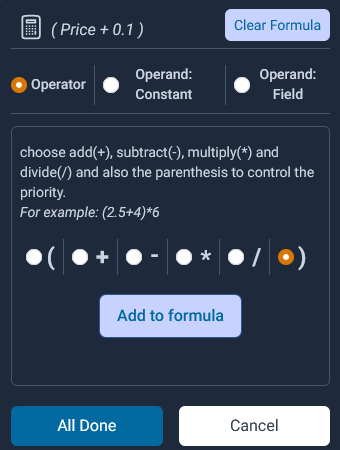
- Choose 'Operator' -> select *, tap 'Add to formula'.
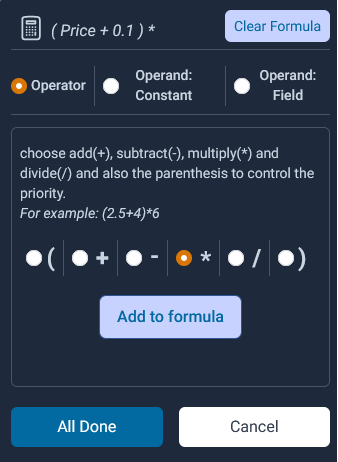
- Choose 'Operand: Field'-> select Quantity, tap 'Add to formula'.
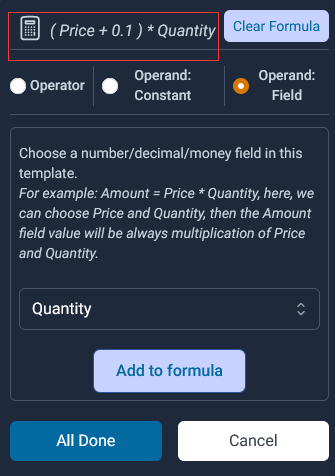
Finally, we have this formula built, if there are anything wrong during the building, we can tap the 'Clear Formula' to reset it.
Tap the 'All Done' button, back to the Add New Field, you would see:

We can check the validity of the formula by tapping the Validate button, it will tell us.
Tap the 'Add Field' to save it to template.

